![[ POTM WINNER ]](images/potm/potm2.png?m=1711891982)

 Tweet
Tweet
Well, here it is, a how to guide on doing the dial LED conversion yourself.
I'll get straight to it...
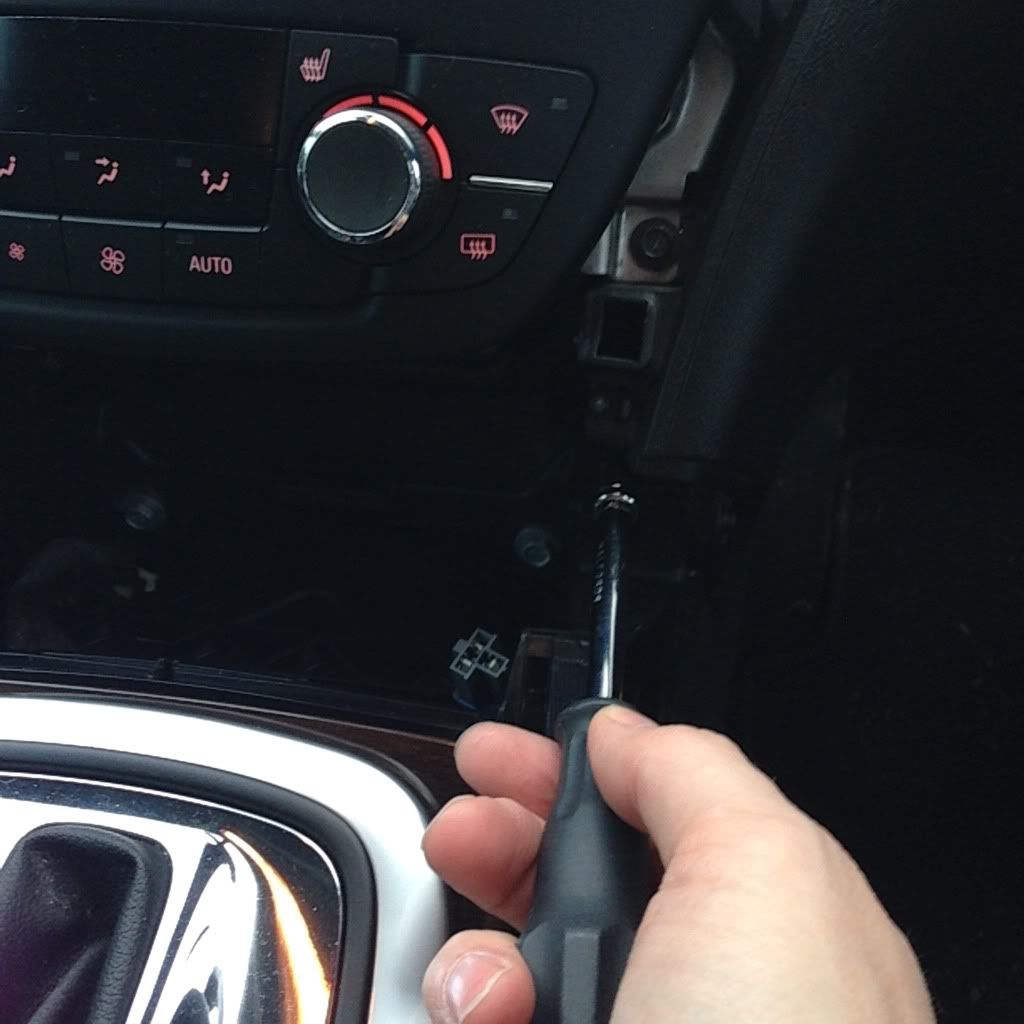
Step 1, remove the drop down crap holder from under your headlight switch. This reveals 2 screws which I believe are 7mm. Remove the two screws and prize out your
headlight switch..
Here are the screws in question

There will be another screw now visible, this needs removing too.
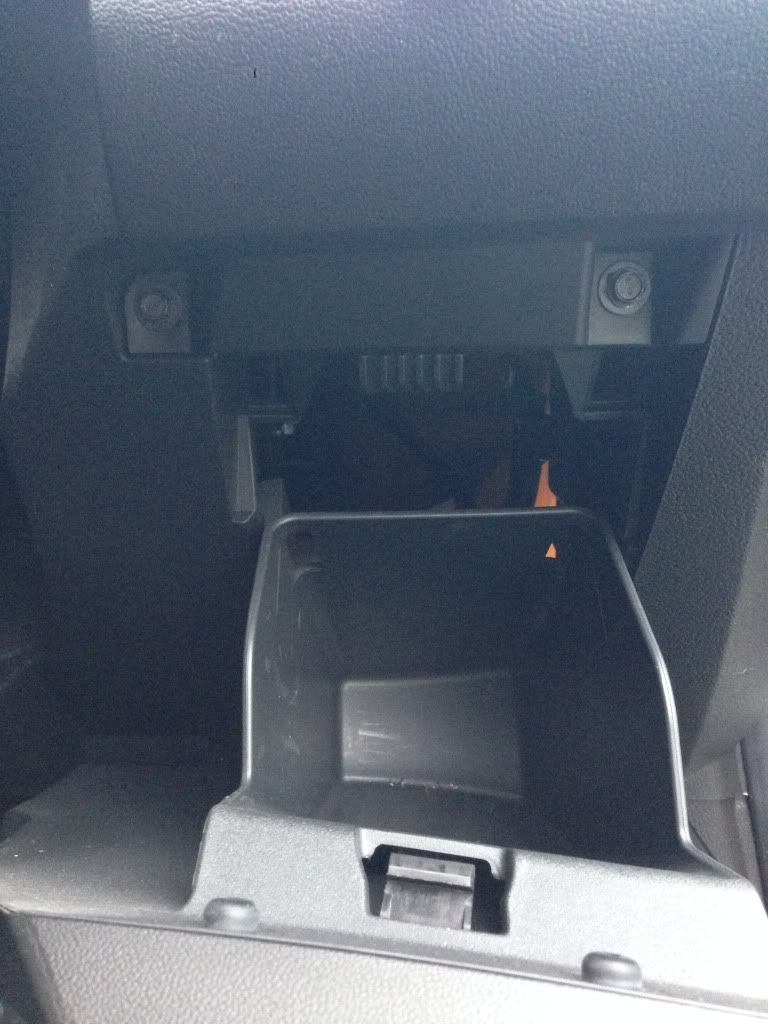
Next you need to remove your centre ashtray, Gently prize off the surround with a trim tool or small flat screwdriver..
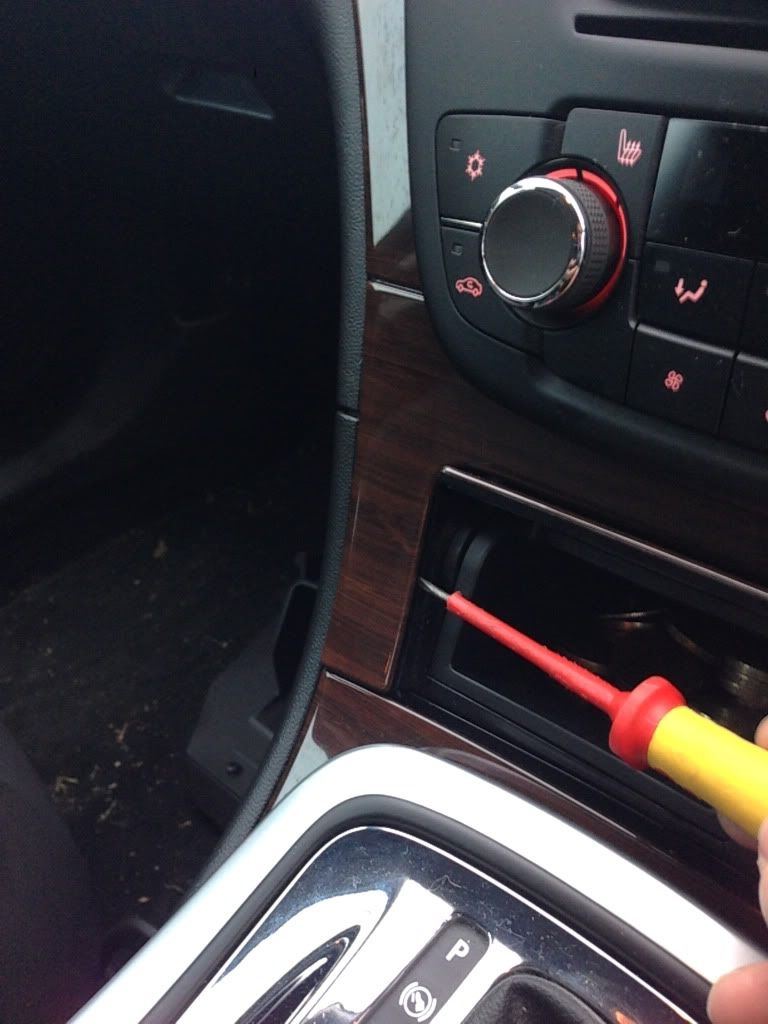
Then pop out and unplug the ashtray.
Next you need to remove the dash trim that runs up towards the dials. This just prizes off. At the top of this another screw is revealed and needs removing. Once this screw
is removed you need to remove the lower plastic trim that sits next to your left leg..
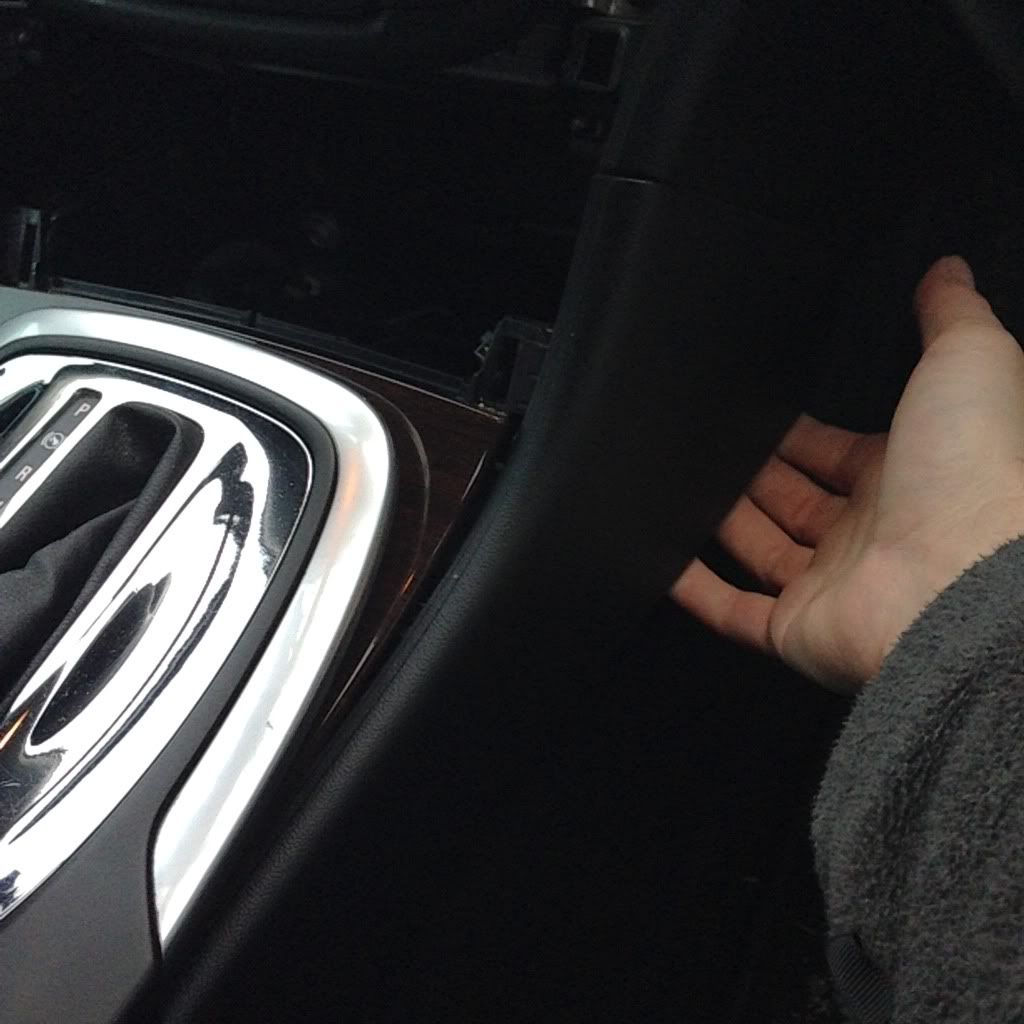
Another two screws are revealed, one to the side of the dash, another hiding tucked away facing forward, remove both of these and now pull away the entire plastic trim
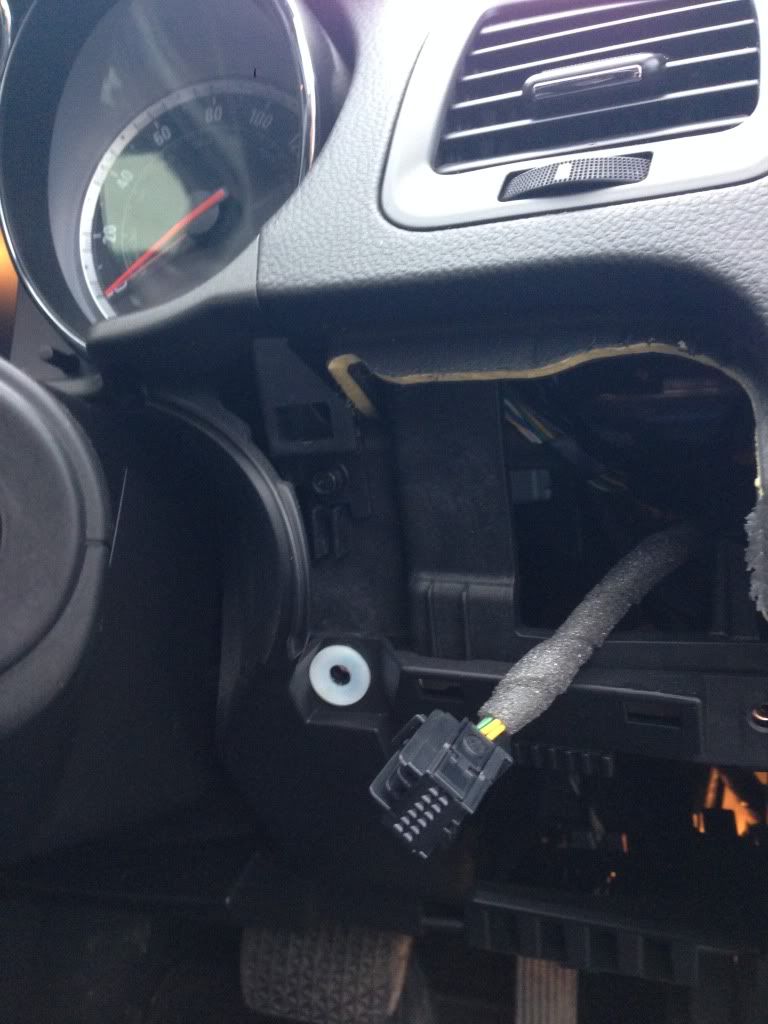
With all trim removed you can now pull forward the rear section of your steering column binnacle and get access to the two screws that hld your dials into place..
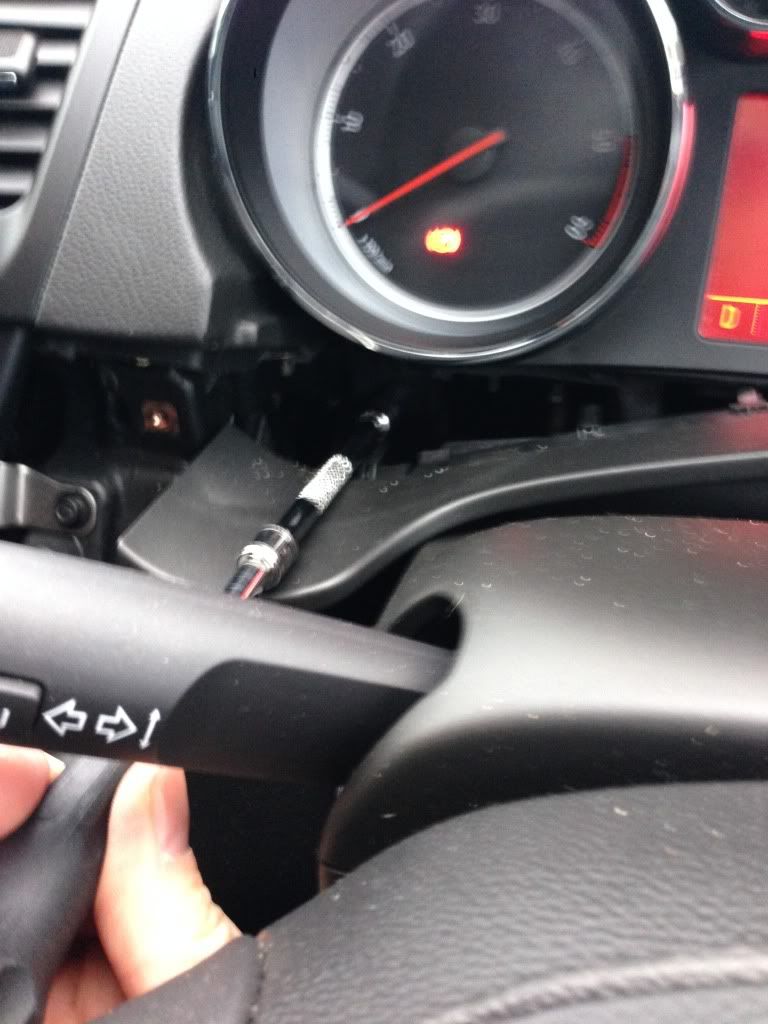
With these removed and your steering wheel all the way towards you, you can now simply pull the dial cluster out of the car and remove the plug on the back of it..
Still with me?
Lets carry on...
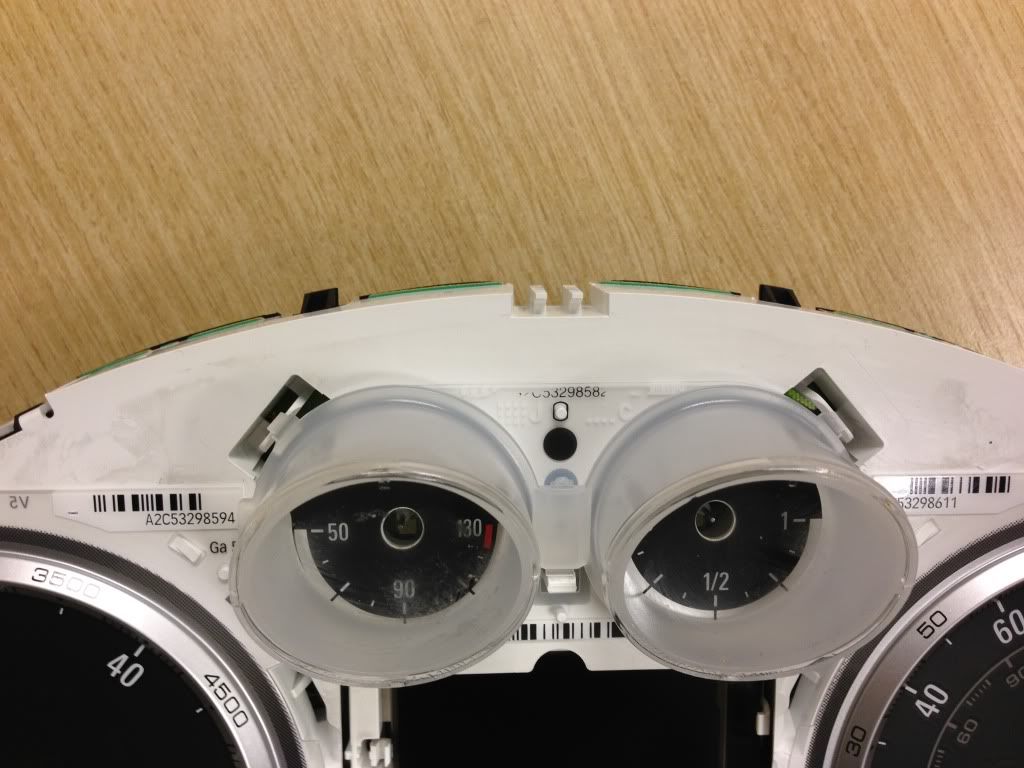
On, the back of the dials there are 4 torx screws, take them all out then with another flat blade srewdriver prize the back section away, the dials then come apart in two
sections. you can now remove the plastic dial fronts, the larger ones have 3 tabs, the inner of the 3 have to be snapped off. You now have access to the needles, twist and
pull these at the same time and they simply come away.
Inner most bezels....
OK, still interested or have you given it up as a bad job?
Now you will see before you a circuit board which, when done properly can give you immense pleasure with simple bright lights!
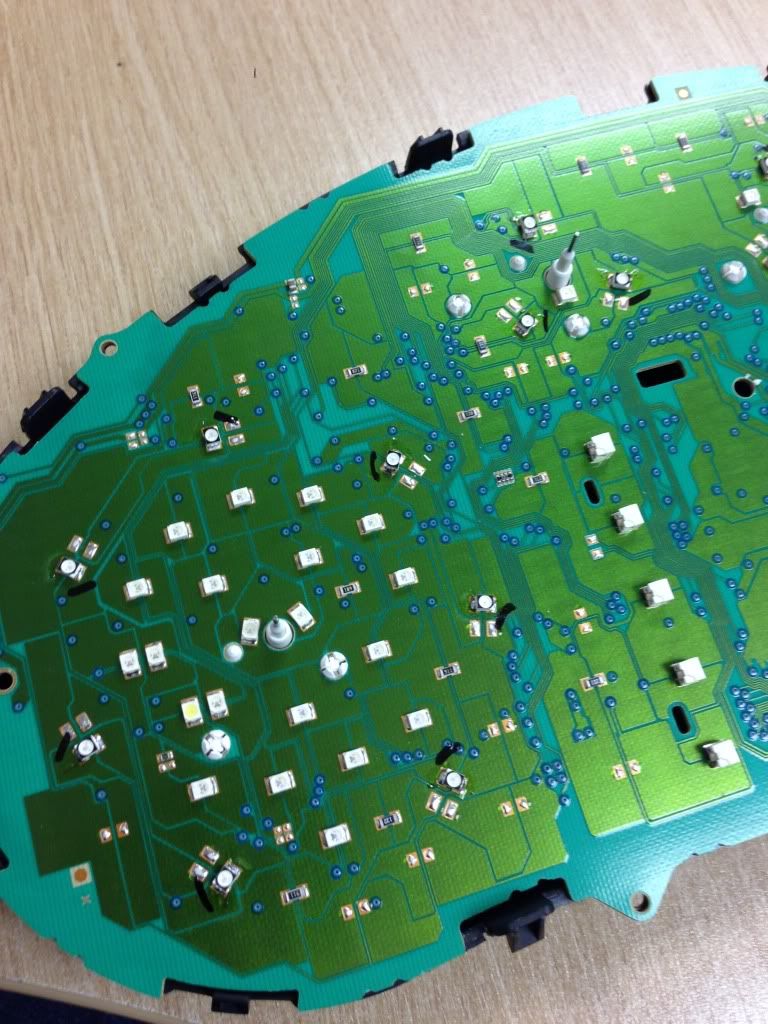
The speedo and rev counter have 7 LED's each, the fuel and temp have 3 each. Before desoldering the old ones you need to use a marker pen and mark up the negative
side of each one. This is denoted by a small cut out on each LED.
Now desolder the old LED's. You can tell which ones they are as they circle each dial and have a yellow front section. For the centre screen you need to use the same
LED's but mounted on theyre side to fire the light into the screen's side. To do this the negative side of your LED goes to the top.
Once your done just re assemble and test.
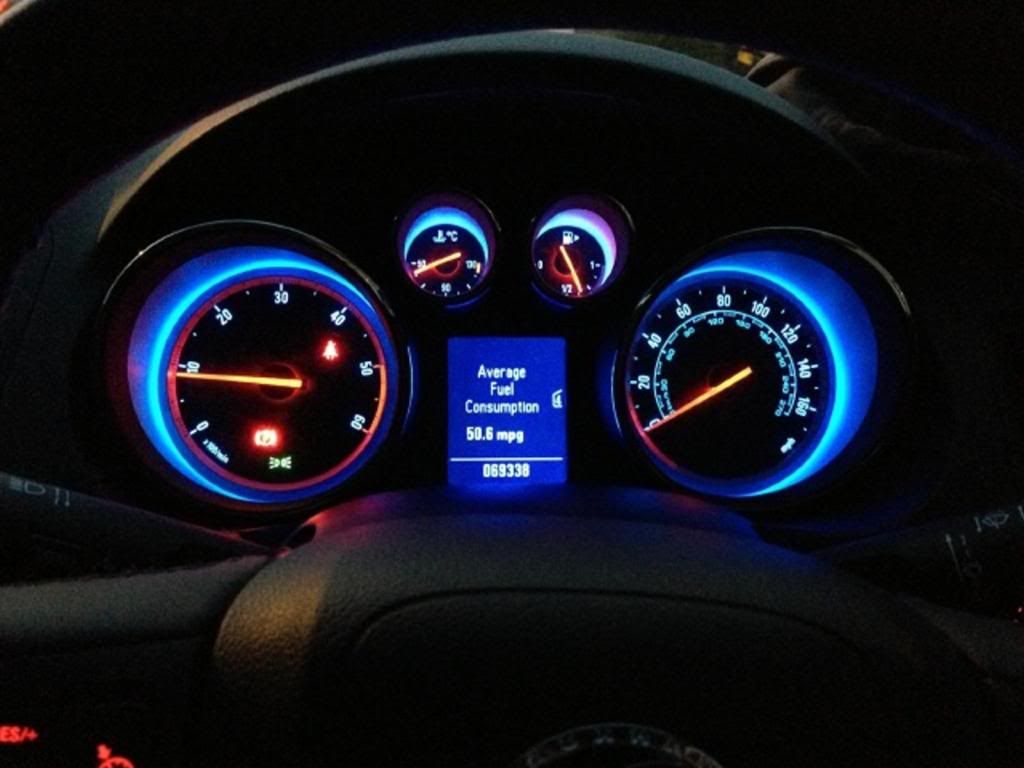
Now, in theory, you should have something like this...
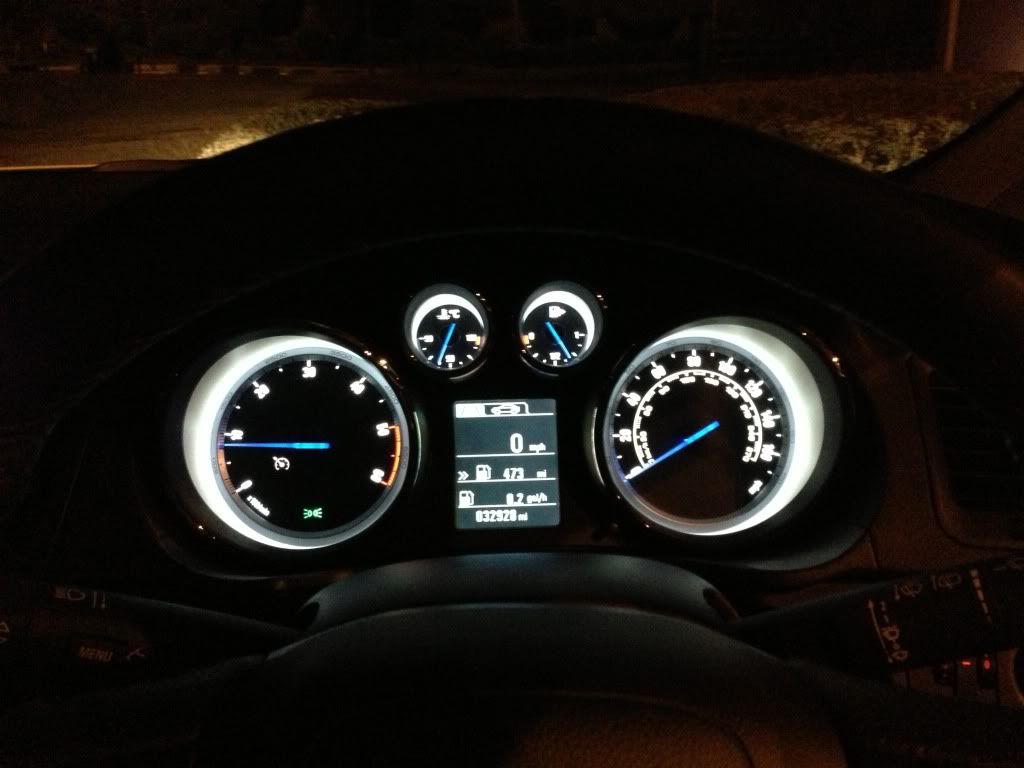
Or this...
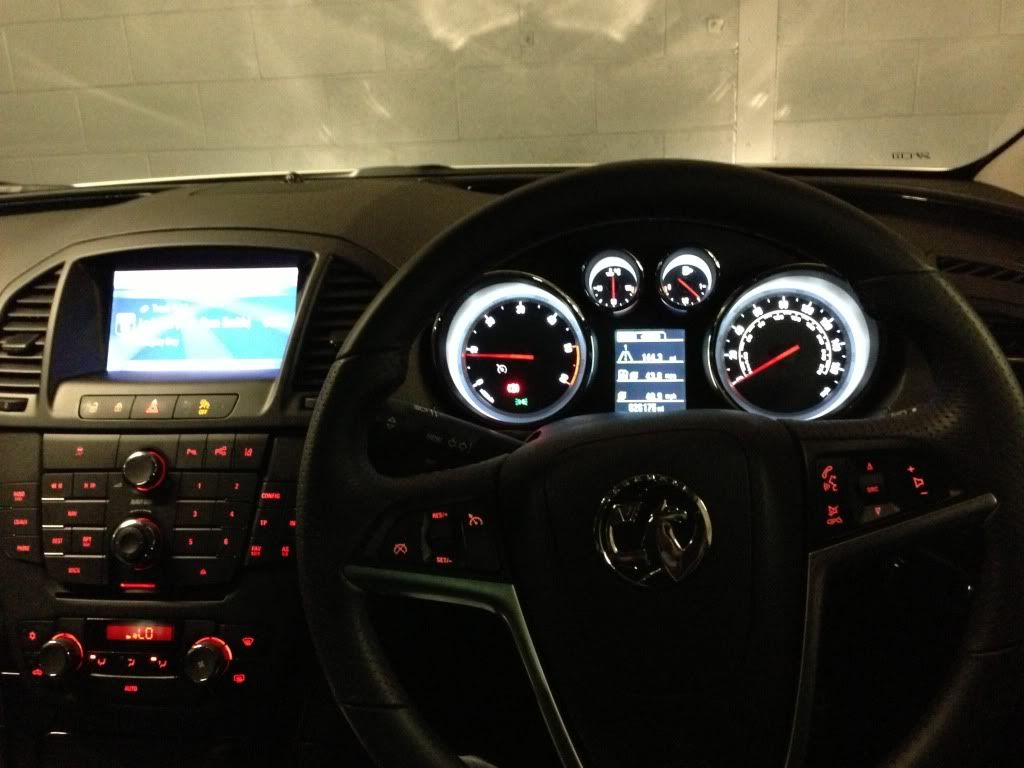
Or this....
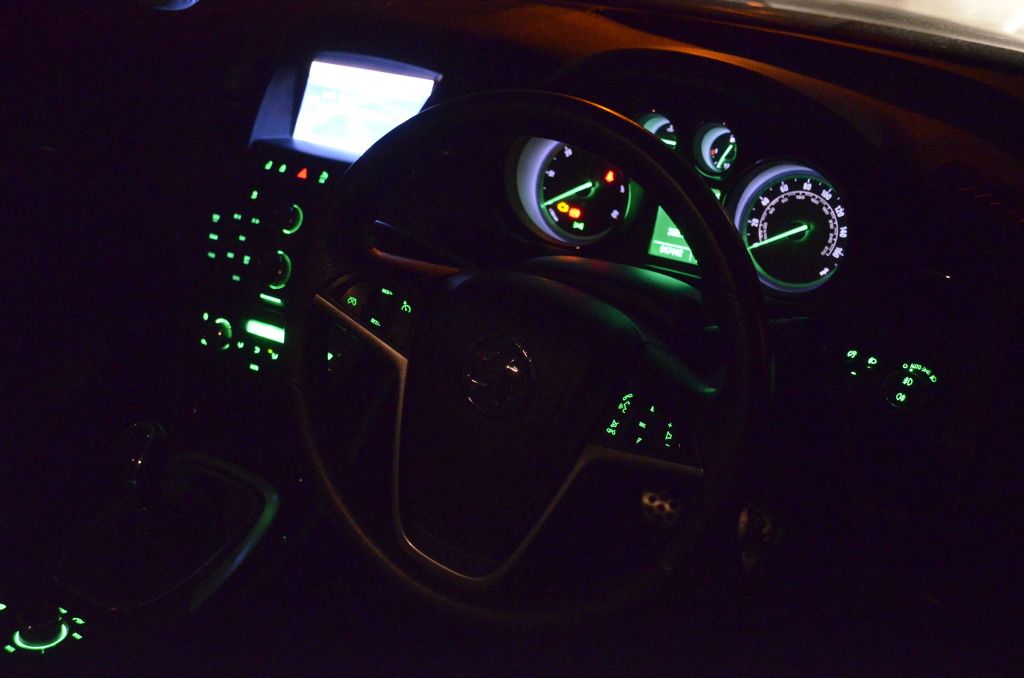
Or this......

Or this.....
Have fun! Oh, and remember, soldering irons are hot so be careful and this is just a guide so I cant accept any responsibility if you goose your car!
I'll get straight to it...
Step 1, remove the drop down crap holder from under your headlight switch. This reveals 2 screws which I believe are 7mm. Remove the two screws and prize out your
headlight switch..
Here are the screws in question
There will be another screw now visible, this needs removing too.
Next you need to remove your centre ashtray, Gently prize off the surround with a trim tool or small flat screwdriver..
Then pop out and unplug the ashtray.
Next you need to remove the dash trim that runs up towards the dials. This just prizes off. At the top of this another screw is revealed and needs removing. Once this screw
is removed you need to remove the lower plastic trim that sits next to your left leg..
Another two screws are revealed, one to the side of the dash, another hiding tucked away facing forward, remove both of these and now pull away the entire plastic trim
With all trim removed you can now pull forward the rear section of your steering column binnacle and get access to the two screws that hld your dials into place..
With these removed and your steering wheel all the way towards you, you can now simply pull the dial cluster out of the car and remove the plug on the back of it..
Still with me?
Lets carry on...
On, the back of the dials there are 4 torx screws, take them all out then with another flat blade srewdriver prize the back section away, the dials then come apart in two
sections. you can now remove the plastic dial fronts, the larger ones have 3 tabs, the inner of the 3 have to be snapped off. You now have access to the needles, twist and
pull these at the same time and they simply come away.
Inner most bezels....
OK, still interested or have you given it up as a bad job?
Now you will see before you a circuit board which, when done properly can give you immense pleasure with simple bright lights!
The speedo and rev counter have 7 LED's each, the fuel and temp have 3 each. Before desoldering the old ones you need to use a marker pen and mark up the negative
side of each one. This is denoted by a small cut out on each LED.
Now desolder the old LED's. You can tell which ones they are as they circle each dial and have a yellow front section. For the centre screen you need to use the same
LED's but mounted on theyre side to fire the light into the screen's side. To do this the negative side of your LED goes to the top.
Once your done just re assemble and test.
Now, in theory, you should have something like this...
Or this...
Or this....
Or this......
Or this.....
Have fun! Oh, and remember, soldering irons are hot so be careful and this is just a guide so I cant accept any responsibility if you goose your car!


Comment