![[ POTM WINNER ]](images/potm/potm1.png?m=1711891982)

 Tweet
Tweet
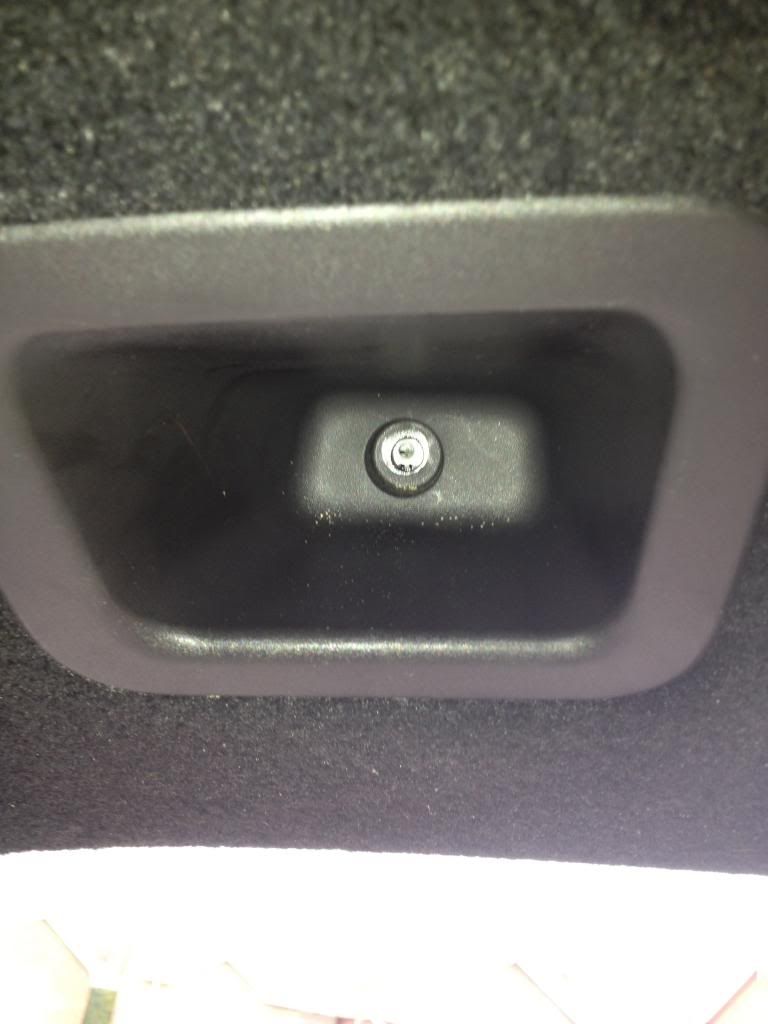
Here is guide on how to remove and repair the boot release switch on the ST.
Important Update: 18/02/2013
Dealer's parts dept now declare that the part can be obtained separately, priced at Ł7.14 + vat, but you have to ask for "the repair kit!"
Part no: 13393912
Dealers originally quote Ł84 for the harness, which has the touchpad, two number plate light plugs, connector. (Ł125 fitted) the part number is 13295821, for the lot.
Touchpad required gm no. 1339...... , only caught half the no on the photo..Doh! (Not available seperately according to spares dept, yet GM only change this in the service bulletin!, the paper tallies detail when the components were manufactured) Wiring harness 24/08/09 & Touchpad 08/11.
Tools required: 7 & 10mm socket, extension bar, socket drive, 10 mm open ended spanner, flat blade screwdriver, a torch, a little courage.
1. Remove the parcel shelf / security blind.
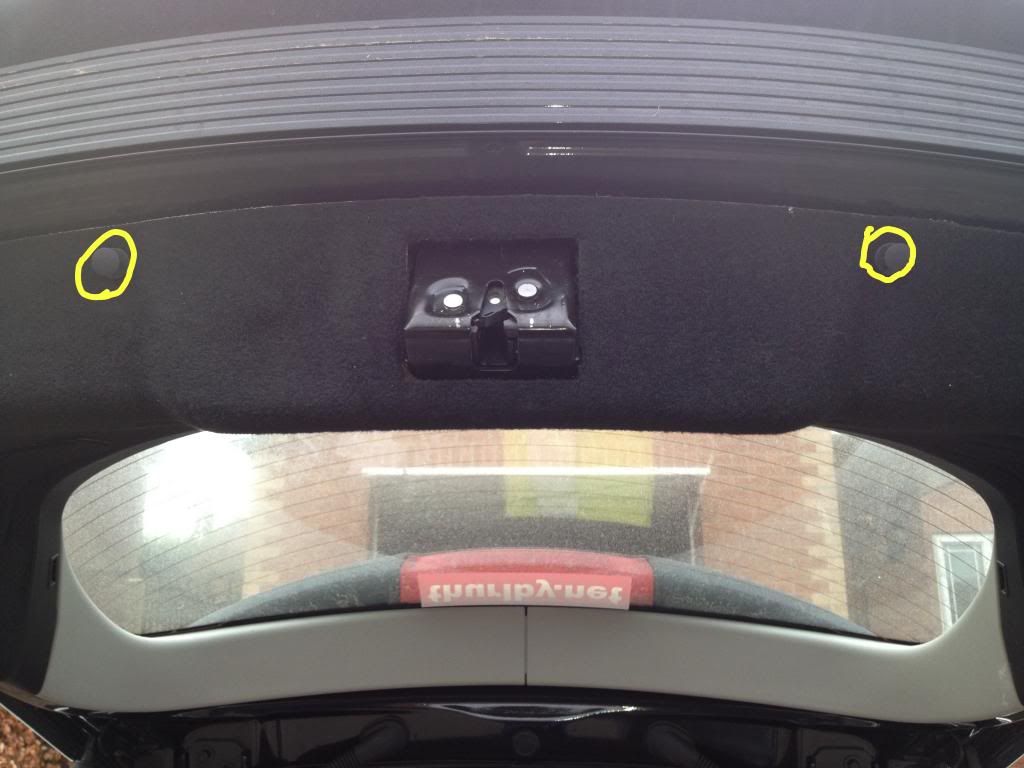
2. Manually open the boot, by: Removing the plastic circular cap, near the warning triangle storage securing elastic.
3. Using the flat blade, locate the small lever inside, place the blade edge into the small hole in the lever, and push it to the rear of the car.
4. The latch should open, push the boot open.
5. Remove three 7 mm bolts, (1 in the handle, 1 either end of the of the warning triangle storage elastics)
6. Remove the two plastic clips, remember lift the centre out first.
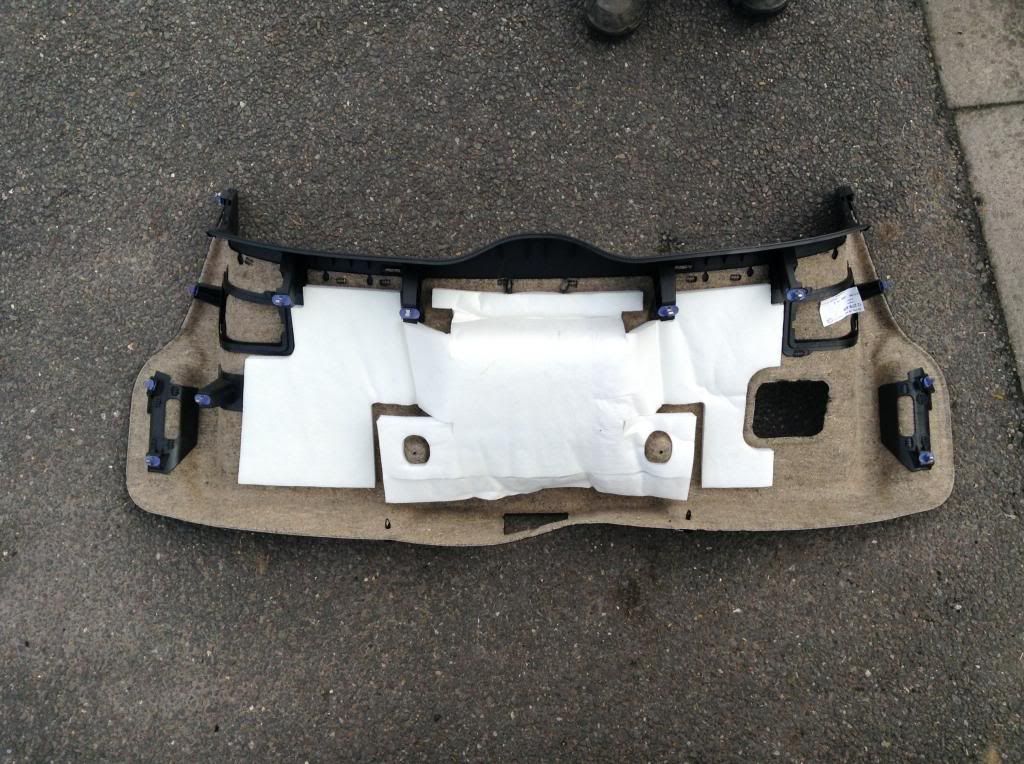
7. Remove the two white upper trim panels, starting with the right on 1st, shown above, then the left. remove from the centre join, held in by three spring clips each side, and locating guides onto the lower trim.
8. Carefully pull the lower trim away, starting at the locking mechanism, working towards the wings, use the torch to see where the blue spring retaining clips are located, see below.
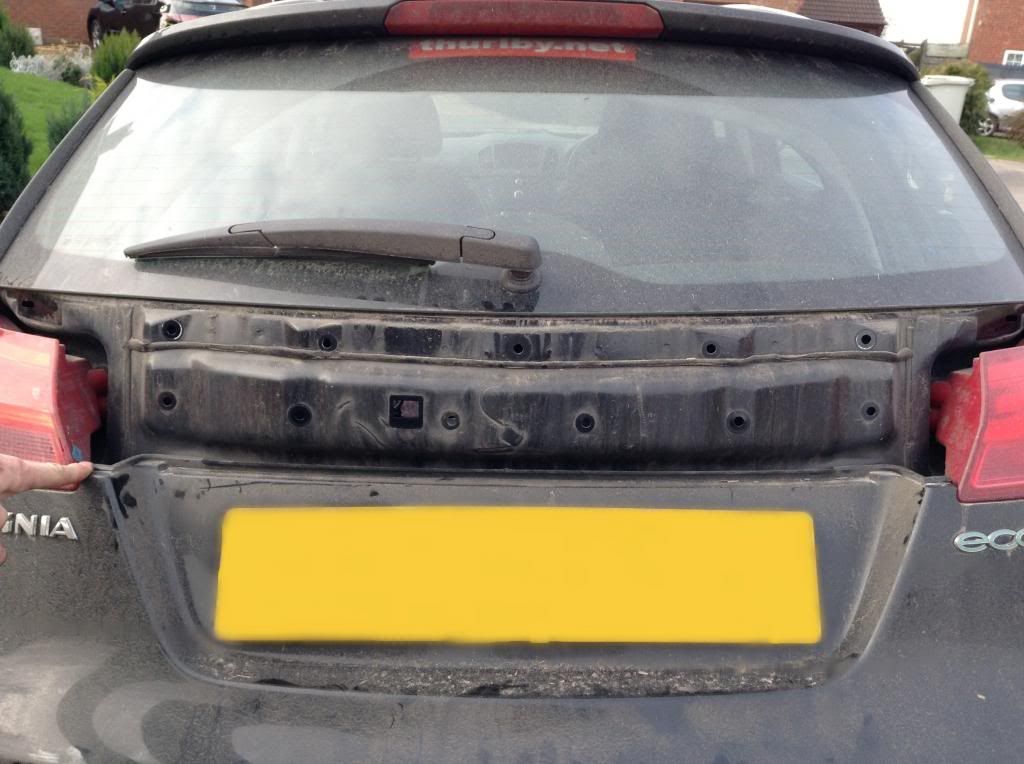
9. Undo the 9 in number 10 mm nuts, (located as red below) 8 require socket access, 1 open ended. Note, there are four white locating plastic pegs, only one is visible from the inside.

10. Unplug the number plate light and release switch plug.
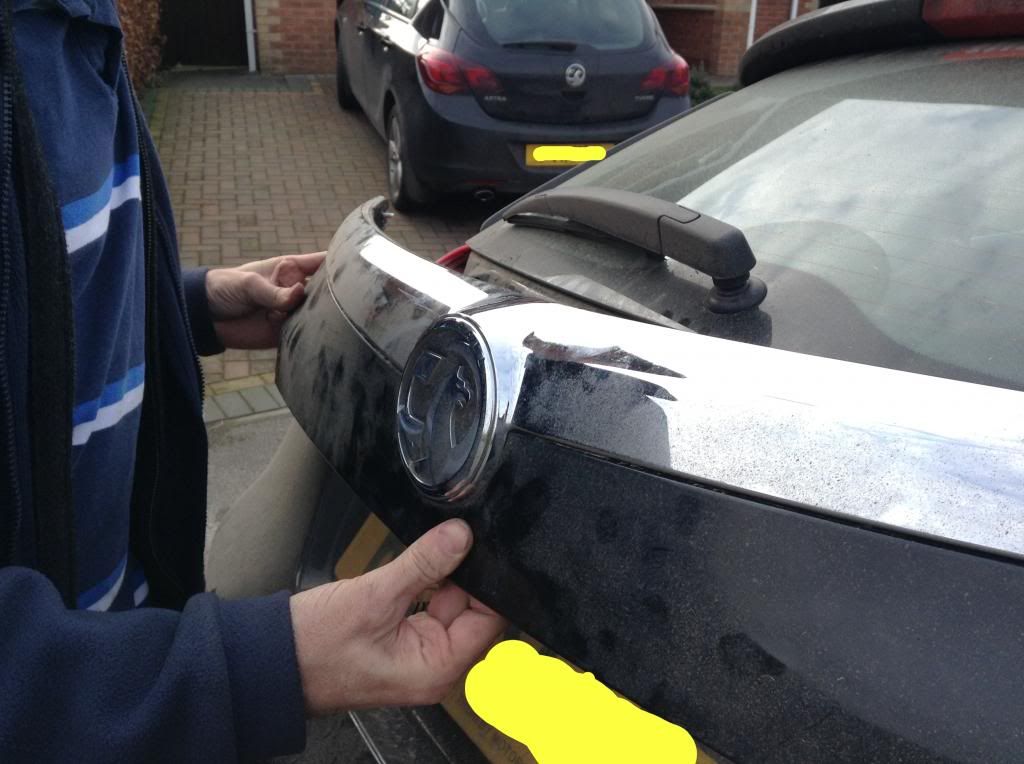
11. Carefully rest the boot nearly closed, to carefully prise off the chrome strip, and boot release section. be brave
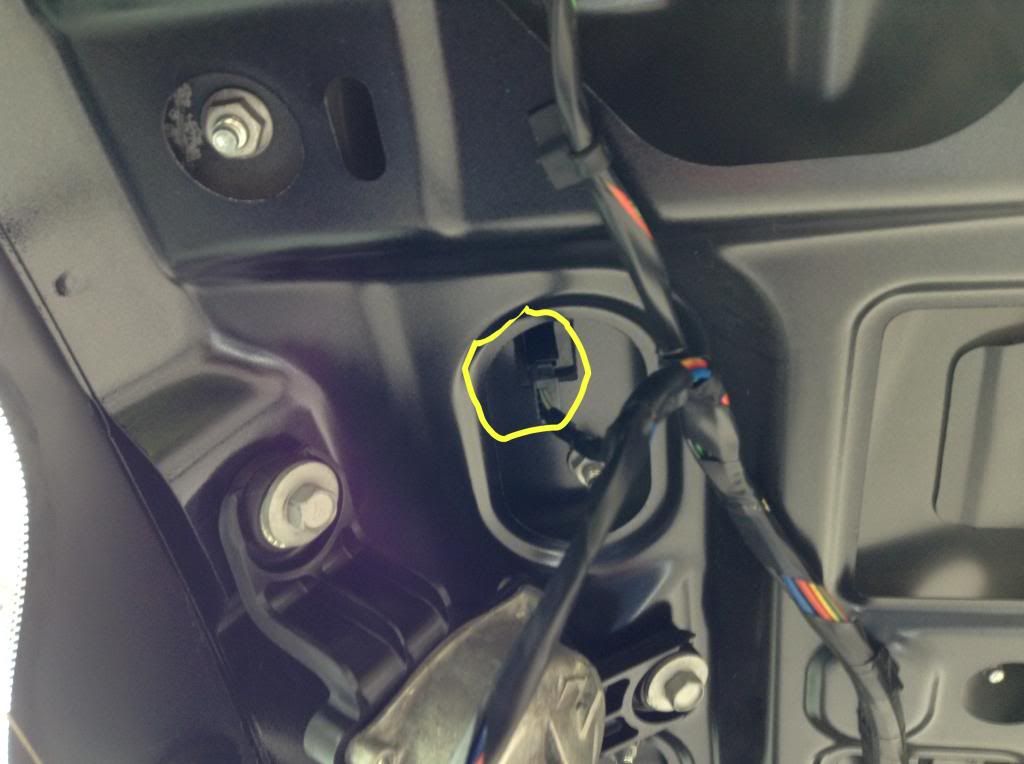
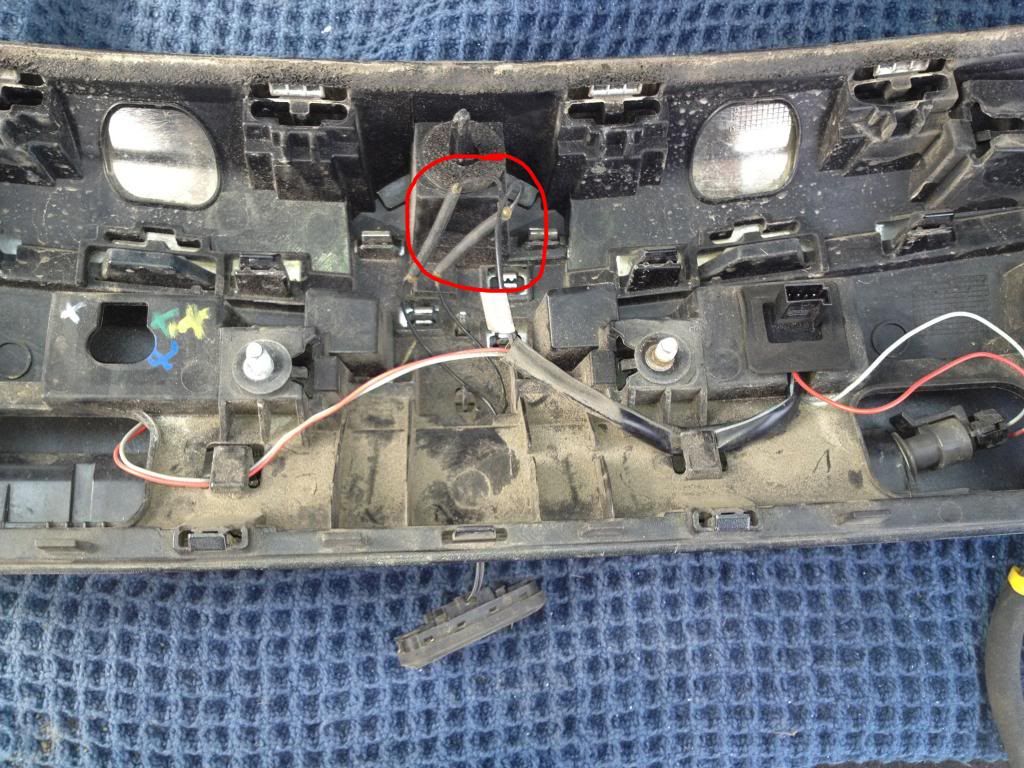
12. the expensive wiring harness can be removed, loosened, and the switch can be released from inside (4 retaining clips/lugs), the circled area shows the joints from when the switch was replaced before, under the TSB.
13. Mine had visible signs of moisture,

14. Took the panel and switch into the house, checked for continuity, between pins 1 & 3, pressed the button, nothing. Heated the switch for several minutes, continuity improved.
15. Switch proved on the car, yes it works sealed the hidden side of the switch with silicon sealant, allowed to dry, tested and refitted.

16. Reassembled the car, leaving the switch to dry thoroughly, and pushed it back into place. test again, v happy.
Important Update: 18/02/2013
Dealer's parts dept now declare that the part can be obtained separately, priced at Ł7.14 + vat, but you have to ask for "the repair kit!"
Part no: 13393912
Dealers originally quote Ł84 for the harness, which has the touchpad, two number plate light plugs, connector. (Ł125 fitted) the part number is 13295821, for the lot.
Touchpad required gm no. 1339...... , only caught half the no on the photo..Doh! (Not available seperately according to spares dept, yet GM only change this in the service bulletin!, the paper tallies detail when the components were manufactured) Wiring harness 24/08/09 & Touchpad 08/11.
Tools required: 7 & 10mm socket, extension bar, socket drive, 10 mm open ended spanner, flat blade screwdriver, a torch, a little courage.
1. Remove the parcel shelf / security blind.
2. Manually open the boot, by: Removing the plastic circular cap, near the warning triangle storage securing elastic.
3. Using the flat blade, locate the small lever inside, place the blade edge into the small hole in the lever, and push it to the rear of the car.
4. The latch should open, push the boot open.
5. Remove three 7 mm bolts, (1 in the handle, 1 either end of the of the warning triangle storage elastics)
6. Remove the two plastic clips, remember lift the centre out first.
7. Remove the two white upper trim panels, starting with the right on 1st, shown above, then the left. remove from the centre join, held in by three spring clips each side, and locating guides onto the lower trim.
8. Carefully pull the lower trim away, starting at the locking mechanism, working towards the wings, use the torch to see where the blue spring retaining clips are located, see below.
9. Undo the 9 in number 10 mm nuts, (located as red below) 8 require socket access, 1 open ended. Note, there are four white locating plastic pegs, only one is visible from the inside.
10. Unplug the number plate light and release switch plug.
11. Carefully rest the boot nearly closed, to carefully prise off the chrome strip, and boot release section. be brave
12. the expensive wiring harness can be removed, loosened, and the switch can be released from inside (4 retaining clips/lugs), the circled area shows the joints from when the switch was replaced before, under the TSB.
13. Mine had visible signs of moisture,
14. Took the panel and switch into the house, checked for continuity, between pins 1 & 3, pressed the button, nothing. Heated the switch for several minutes, continuity improved.
15. Switch proved on the car, yes it works
sealed the hidden side of the switch with silicon sealant, allowed to dry, tested and refitted.16. Reassembled the car, leaving the switch to dry thoroughly, and pushed it back into place. test again, v happy.

 />
/>
Comment